

Explore the fun and exciting world of Arduino Micro Controllers
Explore the fun and exciting world of Arduino Micro Controllers
Skill Level: Beginner
Learn and understand how to use an Arduino micro controller, some basic components and programming techniques. If you have the need to understand how many devices in your everyday life get controlled this is a course for you. Do you want to create and invent cool gadgets, control the lights in your house or turn your electrical fireplace on and off automatically then this is a course for you.
What you will learn
In this course we will discover the wonderful world of using an Arduino Micro controller. We will explore how to connect some basic components to it and how to write basic sketches (programs) for it. You will learn some basic programming techniques and language syntax.
We will be using the SparkFun Inventors Kit for Arduino to go on this journey, plus some of the Arduino Maker Man’s own wisdom to get you on the path to creating your own projects.
Prerequisites:
To be able to complete this course you need to have a basic understanding of math and have a fundamental understanding how to use computer programs.
Price: $400.- (Minimal 8 hours classroom) Unlimited Email support is available for the durations of the course. (Materials not included)
Classroom Sessions
- Introduction to the Arduino Uno Hardware and Software (min 1 Hour max 2 Hours)
- Basic Input and Output (min 1 Hour max 2 Hours)
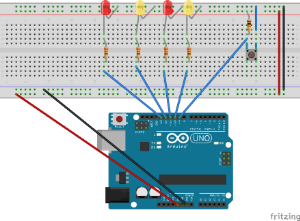
- Basic LED Use (min 1 Hour max 2 Hours)
- The IfThen statement (min 1 Hour max 2 Hours)
- Input Buttons (min 1 Hour Max 2 Hours)
- Loops (min 1 Hour Max 2 Hours)
- Analog Input and Output (min 1 Hour max 2 Hours)
- Variables and all that jazz (min 1Hour max 2 Hours)

The Numitron Clock Course
The Numitron Clock Course
Skill Level: Intermediate / Advanced
Learn and understand how to use IV9 numitron tubes, a RTC clock module and shift registers to create a clock. The numitron IV9 tubes are an inexpensive way to create a nixie style clock.

Skill Level: Intermediate / Advanced
Learn and understand how to use IV9 numitron tubes, a RTC clock module and shift registers to create a clock. The numitron IV9 tubes are an inexpensive way to create a nixie style clock.
What you will learn
In this project you will learn how to link the IV9 numitron tubes to your Arduino Pro Mini using shift registers. You will also learn how to use a Real Time Clock (RTC) breakout board. You will learn how to set and read the time. In this project you will also learn how to use volt regulating hardware and write complex functions.
Prerequisites:
To be able to complete this course you need to have an Intermediate understanding of bread-boarding, and soldering, Intermediate understanding of Arduino programming structures, Intermediate understanding of Arduino variable, and data types.
Price: $350.- (Minimal 7 hours classroom) Unlimited Email support is available for the durations of the course. (Materials not included)
For more information please fill out the form below
Classroom sessions:
- Learn how to connect and IV9 numitron tube to an Arduino (Intermediate) (min 1 hour-max 2 hours)
- Learn to workwith RTC breakout board (Intermediate) (min 1 hour-max 2 hours)
- Learn how to use the Arduino Pro Mini development board. (Intermediate) (min 1 hour-max 2 hours)
- Learn how to use Shift Registers (Advanced) (min 1 hour-max 2 hours)
- Learn how to use volt regulators (Intermediate) (min 1 hour-max 2 hours)
- Basic understanding how to implement LED in a project (Beginner) (min 1 hour-max 2 hours)
- Implementing multiple buttons for setup of time (Beginner) (min 1 hour-max 2 hours)
- Optional Project build

Remote Controlled Cloud Lamp Course
Remote Controlled Cloud Lamp Course
Skill Level: Intermediate
Learn and understand how to use a remote control to change the colours on an addressable LED light strip. In our daily life we use remote controls to turn our tv’s and audio equipment off and on. In this project you going to learn how to implement this in the Arduino environment
What you will learn
In this course we will use the Arduino pro mini which is a small and powerful Arduino board. Learning how to program and use this board you will be one of the new skills you will learn. Another skill we learn is how to use Addressable LED strips. These strips allow you to program each led individually, but only use a few IO ports on your Arduino.
We also are going to use an Infrared (IR) remote control to make your Arduino perform actions. In this part you will learn how to read information from remote controls and send data using IR transmitters.
Prerequisites:
To be able to complete this course you need to have a basic understanding of bread-boarding, soldering, basic understanding of Arduino programming structures, basic understanding of Arduino variable, and data types.
Price: $200.- (Minimal 5 hours classroom) Unlimited Email support is available for the durations of the course. (Materials not included)
Classroom sessions:
- Learn how to use the Arduino Pro Mini development board. (Intermediate) (min 1 hour-max 2 hours)
- Learn how to use RGB Led and Addressable LED (Intermediate) (min 1 hour-max 2 hours)
- Learn to use an Infrared IR remote control in your Arduino projects (Intermediate) (min 1 hour-max 2 hours)
- Learn how to use hardware interrupts to receive sensor data (Intermediate) (min 1 hour-max 2 hours)
- Optional Project build

Motion activated Dancing Skeleton Course
Motion activated Dancing Skeleton Course
Skill Level: Beginner to Intermediate
Learn and understand how to use a motion sensor to activate your project. In this project we are going to learn how to use a motion sensor to play sounds, turn on LED and use a servo motor to create motion in your project.

Skill Level: Beginner to Intermediate
Learn and understand how to use a motion sensor to activate your project. In this project we are going to learn how to use a motion sensor to play sounds, turn on LED and use a servo motor to create motion in your project.
What you will learn
We will learn how to use a PIR motion sensor in an Arduino project. You will also learn how to use a servo motor, and how to use LED lights. Using the WTV020 breakout board we will play music on command. This board can also be used standalone or with an Arduino microcontroller. In this lesson we are going to explore both scenarios.
Prerequisites:
To be able to complete this course you need to have a basic understanding of bread-boarding, soldering, basic understanding of Arduino programming structures, basic understanding of Arduino variable, and data types.
Price: $250.- (Minimal 5 hours classroom). Duration of this course unlimited Email help available (Materials not included)
Classroom sessions:
- How to use a PIR Motion Sensor (Beginner) (min 1 hour-max 2 hours)
- Learn to workwith the WTV020XX sound breakout board (Intermediate) (min 1 hour-max 2 hours)
- Learn how to use Timers instead of Delays in your project (Beginner) (min 1 hour-max 2 hours)
- Basic understanding how to implement LED in a project (Beginner) (min 1 hour-max 2 hours)
- Learn how to use a servo in your project (Beginner) (min 1 hour-max 2 hours)
- Optional Project build

Internet Of Things Weather Station Course
Internet Of Things Weather Station
Skill Level: Intermediate to Advanced
Learn and understand how to create an Internet Of Things Weather Station using the Adafruit Huzzah ESP8266 Breakout board.
Internet Of Things Weather Station
Skill Level: Intermediate to Advanced

Learn and understand how to create an Internet Of Things Weather Station using the Adafruit Huzzah ESP8266 Breakout board.
What you will learn
The ESP8266 Wifi board is a recently new board that has come on the market that makes IOT development more affordable. We will learn to use the Adafruit Huzzah version of this board in this project. Another new concept is the Internet Of Things (IOT) concept. In this course we will explore what it really is and use it to get up-to-date weather information.
To display all this we are going to learn how to use the Nokia 5100 LCD display. You will learn how to display both text and graphics on this display
Prerequisites:
To be able to complete this course you need to have a basic understanding of bread-boarding, soldering, use of buttons, basic understanding of Arduino programming structures, basic understanding of Arduino variable, and data types.
Price: $300.- (Minimal 6 hours classroom) Unlimited Email support is available for the duration of the course. (Materials not included)
For more information and course dates please fill out the form below
Classroom sessions:
- What is the Internet Of Things IOT (Beginner) (min 1 hour-max 2 hours)
- Setting up theAdafruit Huzzah ESP8266 Breakout board (Intermediate) (min 1 hour-max 2 hours)
- String parsing and Manipulations (Intermediate) (min 1 hour-max 2 hours)
- How to write functions and subroutines and reuse code (Advanced) (min 1 hour-max 2 hours)
- Use Timers to improve response from input buttons and sensors (Intermediate) (min 1 hour-max 2 hours)
- Using the Nokia 5100 LCD Display (Intermediate) (min 1 hour-max 2 hours)
- Optional Project build

GPS Puzzle Box/ Reversed Geocache Course
GPS Puzzle Box/ Reversed Geocache Course
Skill Level: Intermediate/Advanced
Learn and understand how to use a GPS module in your projects. We are going to embed a GPS module in a puzzle box to find a predetermined location. When this location is reached the puzzle box will open and its content can be retrieved.
GPS Puzzle Box/ Reversed Geocache Course
Skill Level: Intermediate/Advanced

Learn and understand how to use a GPS module in your projects. We are going to embed a GPS module in a puzzle box to find a predetermined location. When this location is reached the puzzle box will open and its content can be retrieved.
What you will learn
You will learn to store the GPS coordinates in the Arduino’s EPROM memory using USB Serial input so you can set different coordinates without having to reprogram the Arduino. Through USB serial you can also lock and unlock the box to add or change items to the box.
Using a relay switch you also will learn how to automatically switch your project off after a specific time to save battery power. By pressing a push button the system will turn itself back on.
Prerequisites:
To be able to complete this course you need to have an Intermediate understanding of bread-boarding, and soldering, Intermediate understanding of Arduino programming structures, Intermediate understanding of Arduino variable, and data types.
Price: $300.- (Min 6 hr classroom) Unlimited Email Support during project (Materials not included)
For more information and available dates please fill out the form below
Classroom sessions:
- Learn how to use the Arduino Pro Mini development board. (Intermediate) (min 1 hour-max 2 hours)
- Learn how to work with the Adafruit GPS breakout (Intermediate/Advanced) (min 1 hour-max 2 hours)
- Learn how to write and read data the Arduino eprom (Intermediate) (min 1 hour-max 2 hours)
- Learn how to use an 32 character lcd display (Beginner) (min 1 hour-max 2 hours)
- Learn how to communicate with an Arduino Uno through USB Serial Input (Intermediate) (min 1 hour-max 2 hours)
- Learn how to use a relay in your projects (Beginner) (min 1 hour-max 2 hours)
- Optional Project buil